.svg)


.png)
CanJS has always been fully modular and can be used with different module formats like AMD or CommonJS and installed via Bower or NPM or the direct download. When using a module loader - unlike many other frameworks that simply provide a UMD wrapper for the entire library - CanJS will only load the dependencies it really needs.
This is the beginning of a series of posts that go over different combinations of package managers and module loaders and how to set them up with CanJS.
In this post we will talk about using CanJS with the new StealJS and NPM which provides a seamless, zero-configuration development experience.
NPM and Steal setup
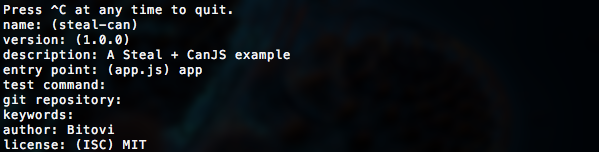
In a new folder initialize a package.json by answering the prompts from
npm init
The only important prompt here is to set the entry point to app which will be our main application file:
Then install and save the steal and can packages:
npm install can steal --save
jQuery will be installed and loaded automatically since it is a peer dependency of CanJS. Then create an index.html like this:
<!DOCTYPE html>
<html>
  <head>
    <title>CanJS + Steal + NPM demo</title>
  </head>
  <body>
    <script type="text/javascript" src="node_modules/steal/steal.js"></script>
  </body>
</html>
Steal will now automatically load its configuration from the package.json we initialized. Because it supports different module formats we can choose to use ES6 modules (and any other ES6 features provided by the Traceur or Babel transpilers), CommonJS or AMD. In ES6 an app.js that loads jQuery and Stache and renders a simple template when the document is ready can look like this:
import $ from 'jquery';
import stache from 'can/view/stache/stache';

const template = stache('Hello !');

$(() => {
  $('body').append(template({ message: 'David' }));
});
The same file in CommonJS would look like:
var $ = require('jquery');
var stache = require('can/view/stache/stache');

var template = stache('Hello !');

$(function() {
  $('body').append(template({ message: 'David' }));
});
And using AMD like this:
define(['jquery', 'can/view/stache/stache'], function($, stache) {
  var template = stache('Hello !');

  $(function() {
    $('body').append(template({ message: 'David' }));
  });
});
If you now open index.html you will see that all dependencies are being loaded and the view is rendered.
Configuring StealJS
This zero configuration approach already works with many client-side JavaScript libraries that are available on NPM like jQuery, Lodash, MomentJS or ChartJS. Additional configuration, like mappings and shims to libraries that do not support a module loader can be put into a system property in the package.json.
For example, if you downloaded the Tooltipster jQuery plugin and put it into a lib/tooltipster folder in your project, the configuration to make it available as the tooltipster module and load its CSS file automatically would look like this:
{
  "name": "steal-can",
  "version": "0.0.1",
  "description": "A StealJS + CanJS example",
  "main": "app",
  "author": "Bitovi",
  "license": "MIT",
  "dependencies": {
    "can": "^2.2.5",
    "jquery": "^2.1.3",
    "steal": "^0.9.3"
  },
  "system": {
    "paths": {
      "tooltipster": "lib/tooltipster/js/jquery.tooltipster.js"
    },
    "meta": {
      "tooltipster": {
        "deps": ["lib/tooltipster/css/tooltipster.css!"]
      }
    }
  }
}
Then we can load and initialize the plugin in app.js:
import $ from 'jquery';
import 'tooltipster';
import stache from 'can/view/stache/stache';

const template = stache('<div title="Hello {{message}}!">Hover me for a tooltip</div>');

$(() => {
  $('body').append(template({ message: 'David' }));
  $('div').tooltipster();
});
When you now reload the page you will see the tooltip when hovering over the element.
Production build
To build the project for production we will use the steal-tools NPM package that we can install as a development dependency:
npm install steal-tools --save-dev
Running steal-tools without any parameters will build using our package.json as the configuration. Lets add a build NPM script that simply runs the steal-tools binary we just installed:
{
  "name": "steal-can",
  "version": "0.0.1",
  "description": "A StealJS + CanJS example",
  "main": "app",
  "scripts": {
    "build": "steal-tools"
  },
  "author": "Bitovi",
  "license": "MIT",
  "dependencies": {
    "can": "^2.2.5",
    "jquery": "^2.1.3",
    "steal": "^0.9.3"
  },
  "devDependencies": {
    "steal-tools": "^0.9.4"
  },
  "system": {
    "paths": {
      "tooltipster": "lib/tooltipster/js/jquery.tooltipster.js"
    },
    "meta": {
      "tooltipster": {
        "deps": ["lib/tooltipster/css/tooltipster.css!"]
      }
    }
  }
}
The production build can now be kicked off with:
npm run build
The build files will end up in dist/bundles/app.css and dist/bundles/app.js. To load those files instead of the individual modules we need to add a main="app" and env="production" to the Steal script tag in index.html:
<!DOCTYPE html>
<html>
  <head>
    <title>CanJS + Steal + NPM demo</title>
  </head>
  <body>
    <script type="text/javascript" src="node_modules/steal/steal.js" env="production" main="app"></script>
  </body>
</html>
Now the application is ready to ship.
Conclusion
In this post we went over a simple application that uses StealJS, NPM and CanJS and also configured Steal to load a third party jQuery plugin and use it in a CanJS Stache template. We were able to make a production build for both, JavaScript and CSS with no other configuration than a package.json. You can download the demo application in this Gist.