


Managing State with useState page
Work with React’s useState Hook to manage a component’s state.
Overview
In this section, you will:
- Get an overview of state management.
- Cover the fundamentals of React Hooks.
- Review the Rules of Hooks.
- Learn about the
useStateHook. - Create custom Hooks.
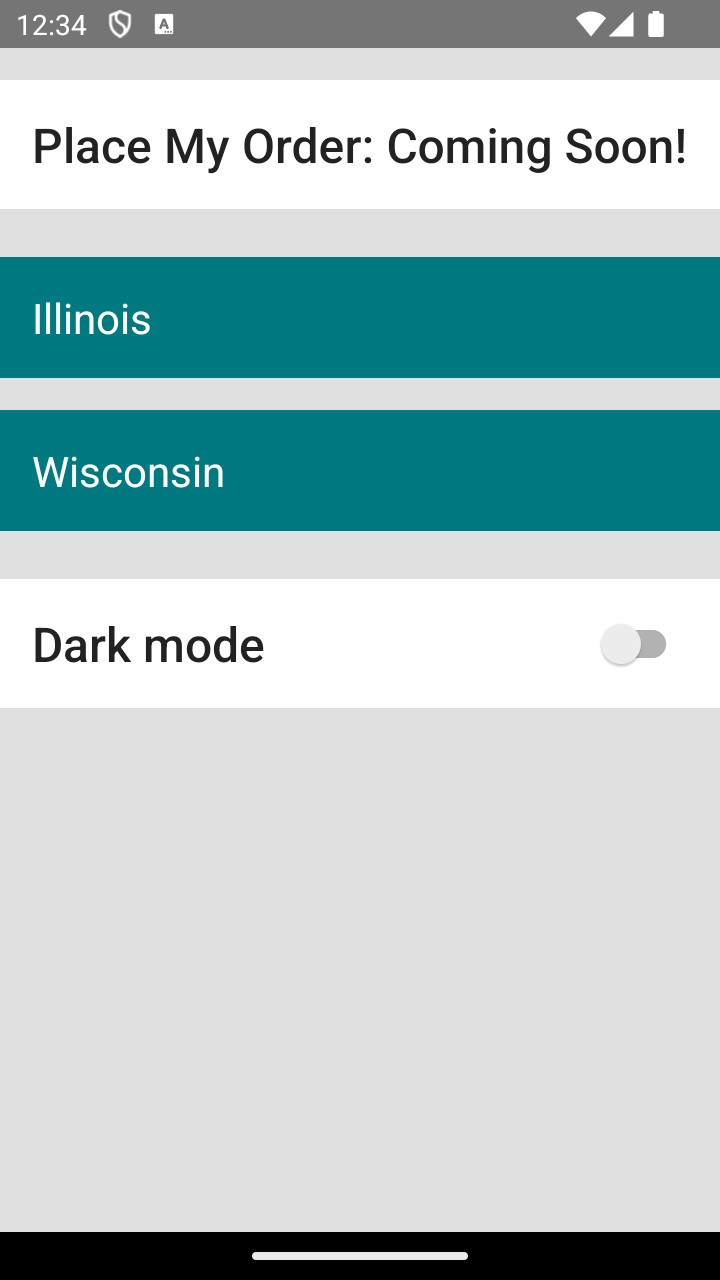
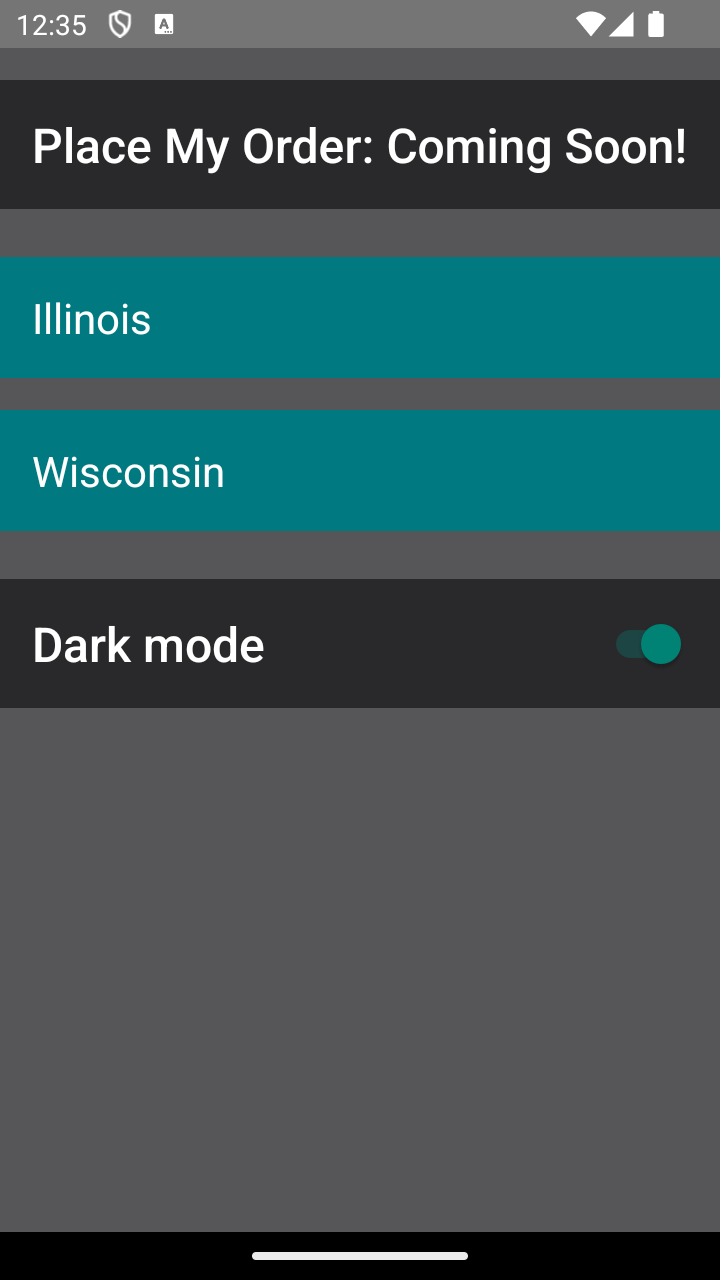
Objective: Toggle between light and dark mode
We will be setting up the application to switch between light mode and dark mode:
Overview of state management
State in React Native is a crucial concept, as it represents the parts of an app that can change over time. Each component can have its state, allowing them to maintain and manage their data independently. When the state changes, React Native re-renders and update the native UI components if it needs to.
There are different types of state within an application:
- Global State: This refers to data that is shared between multiple components. In React Native, global state can be managed using Context API or state management libraries; this is covered in the previous lesson Using React Context.
- Local State: This is data we manage in the component that uses it. Local state is managed in React Native using the
useStateHook. - UI State: This is a subset of Local State, but is limited to minor UI effects, such as the visibility of a drawer or open section of an accordion.
Intro to React Hooks
We’ve mentioned before that useState is a Hook for managing state, but what does that mean?
React Hooks (referred to as just Hooks for the rest of this training) are special functions that allow us to “hook” into React Native functionality. Hooks provide us with many conveniences like sharing stateful logic between components and simplifying what would be otherwise complex components.
We’ve already seen and used a Hook while building Place My Order! Do you remember this code from earlier?
import { createContext, useContext, useMemo } from "react"

import theme, { Theme } from "./theme"

interface ThemeContext {
  theme: Theme
}

const Context = createContext<ThemeContext>({
  theme,
})

const ThemeProvider: React.FC<{ children: React.ReactNode }> = ({
  children,
}) => {
  const value = useMemo(() => ({ theme }), [])

  return <Context.Provider value={value}>{children}</Context.Provider>
}

export default ThemeProvider

export function useTheme(): Theme {
  const { theme } = useContext(Context)

  return theme
}
The useContext and useMemo Hook from react allowed us to optimize the performance of our applications by efficiently managing context and memoizing expensive computations respectively.
The Rules of Hooks
React Native imposes several rules around the use of Hooks:
First, only call Hooks from React Native function components or your custom Hooks.
Second, all the Hooks in a React Native function must be invoked in the same order every time the function runs, so no Hooks can occur after an
if,loop, orreturnstatement. Typically this means all Hooks are placed at the top of the React Native function body.Third, Hooks must be named by prefixing their functionality with
use(e.g.useContext).
The useState Hook
We can store the state that persists through component rendering with the useState Hook. You can set the initial state value when the component first renders by providing the value as an argument to the Hook. If you do not provide a value the initial state value will be undefined.
This example shows a useState Hook being set with an initial value of "":
import { ChangeEvent, useState } from "react"
import { Text, TextInput, View } from "react-native"

const NameField: React.FC = () => {
  const [value, setValue] = useState<string>("")

  const handleChange = (event: ChangeEvent<HTMLInputElement>) => {
    setValue(event.target.value)
  }

  return (
    <View>
      <Text>Name</Text>
      <TextInput
        onChangeText={handleChange}
        value={value}
        style={{ borderWidth: 1, borderColor: "gray", padding: 10 }}
      />
    </View>
  )
}
As you can see in the previous example, useState returns an array with two elements: the first is the current state value of the Hook, and the second is a setter function that is used to update the state value.
In the following code, the value is being rendered and the setter is being used to keep track of which input value the user has typed:
import { ChangeEvent, useState } from "react"
import { Text, TextInput, View } from "react-native"

const NameField: React.FC = () => {
  const [value, setValue] = useState<string>("")

  const handleChange = (event: ChangeEvent<HTMLInputElement>) => {
    setValue(event.target.value)
  }

  return (
    <View>
      <Text>Name</Text>
      <TextInput
        onChangeText={handleChange}
        value={value}
        style={{ borderWidth: 1, borderColor: "gray", padding: 10 }}
      />
    </View>
  )
}
Every time a useState’s setter is invoked with a new value, React Native compares the new value with the current value. If the values are the same, nothing happens; if the values are different, React Native will rerender the component so the new state value can be used to update the component.
In the example above, when the user types, the NameField component is rendered again, and the TextInput is updated with the current value.
What are custom Hooks?
React Native’s Hooks API provides a powerful and flexible way to encapsulate and reuse functionality across our components. While React Native comes with a set of built-in Hooks, we can also create our own custom Hooks. This allows us to abstract component logic into reusable functions. Custom Hooks are particularly useful when we find ourselves repeating the same logic in multiple components.
Custom Hooks are JavaScript functions that can use other React Hooks and provide a way to share logic across multiple components. Like built-in Hooks, custom Hooks must adhere to React’s rules of Hooks. The naming convention for custom Hooks is to start with use, like useCustomHook.
Why use custom Hooks?
Putting stateful logic into a custom Hook has numerous benefits:
Separation of concerns: Custom Hooks allow you to separate complex logic from the component logic. This makes your main component code cleaner and more focused on rendering UI, while the custom Hook handles the business logic or side effects. It aligns well with the principle of single responsibility, where a function or module should ideally do one thing only.
Simplifying components: If your component is becoming too large and difficult to understand, moving some logic to a custom Hook can simplify it. This not only improves readability but also makes it easier for other developers to grasp what the component is doing.
Easier testing and maintenance: Isolating logic into custom Hooks can make your code easier to test and maintain. Since Hooks are just JavaScript functions, they can be tested independently of any component. This isolation can lead to more robust and reliable code.
Reusability: One of the primary reasons for creating custom Hooks is reusability. You might find yourself repeating the same logic in different components—for example, fetching data from an API, handling form input, or managing a subscription. By refactoring this logic into a custom Hook, you can easily reuse this functionality across multiple components, keeping your code DRY (Don’t Repeat Yourself).
How to create a custom Hook
To create a custom Hook, you start by defining a function that starts with use. This Hook can call other Hooks and return whatever value is necessary.
Let’s look at the provided Hook below that keeps track of a boolean state, and also provides a function for toggling that state:
import { useState } from "react"

export function useToggle(intialValue = true) {
  const [on, setOn] = useState(intialValue)

  const handleToggle = (value?: unknown) => {
    if (typeof value === "boolean") {
      setOn(value)
    } else {
      setOn(!on)
    }
  }

  return [on, handleToggle]
}
In the example above, you can see that our useToggle Hook is a function that has an internal useState to keep track of the toggle’s on/off status. This Hook has a handleToggle function for changing its internal state. Lastly, we can see that the useToggle Hook returns an array with the on status and the handleToggle function.
How to use a custom Hook
How would we use this Hook? Let’s take a look at this example:
import React from "react"
import { View, Text, Switch } from "react-native"

import { useToggle } from "./useToggle"

const Toggle: React.FC = () => {
  const [active, toggleActive] = useToggle(true)

  return (
    <View>
      <Switch onValueChange={toggleActive} value={active} />
      <Text>{active ? "On" : "Off"}</Text>
    </View>
  )
}

export default Toggle
In this component, we call our useToggle Hook with the initial state (true). Our Hook returns the active state and toggleActive function for changing the on/off state.
This is how we can create our custom useToggle Hook and call it in our components, just like React’s built-in Hooks!
Using the Appearance module
The Appearance module in React Native allows you to access the user’s preferred color scheme (light or dark).
This helps in creating responsive designs that adapt to user preferences without requiring manual theme switches in your app.
To get the current theme, use the getColorScheme method.
It returns either 'light', 'dark', or null if the preference is not set.
import { Appearance } from "react-native"

const colorScheme = Appearance.getColorScheme()

if (colorScheme === "dark") {
  // Dark mode logic
} else {
  // Light mode logic
}
Setup
✏️ Update src/design/theme/theme.ts to be:
import { TextStyle } from "react-native"

interface Palette {
  main: string
  soft: string
  strong: string
  contrast: string
}

export interface Theme {
  palette: {
    screen: Palette
    primary: Palette
    secondary: Palette
  }
  spacing: {
    none: 0
    xs: number
    s: number
    m: number
    l: number
    xl: number
  }
  typography: {
    title: TextStyle
    heading: TextStyle
    body: TextStyle
    label: TextStyle
  }
}

export type ThemeMargin =
  | keyof Theme["spacing"]
  | [keyof Theme["spacing"], keyof Theme["spacing"]]
export type ThemePadding =
  | keyof Theme["spacing"]
  | [keyof Theme["spacing"], keyof Theme["spacing"]]

const light: Theme = {
  palette: {
    screen: {
      main: "#ffffff",
      soft: "#e0e0e0",
      strong: "#ffffff",
      contrast: "#222222",
    },
    primary: {
      main: "#007980",
      soft: "#00a5ad",
      strong: "#006166",
      contrast: "#ffffff",
    },
    secondary: {
      main: "#ca2f35",
      soft: "#d93237",
      strong: "#a3262b",
      contrast: "#ffffff",
    },
  },
  spacing: {
    none: 0,
    xs: 4,
    s: 8,
    m: 16,
    l: 24,
    xl: 40,
  },
  typography: {
    title: {
      fontSize: 21,
      fontWeight: "500",
    },
    heading: {
      fontSize: 24,
      fontWeight: "500",
    },
    body: {
      fontWeight: "normal",
    },
    label: {
      fontSize: 12,
      fontWeight: "bold",
    },
  },
}

const dark: Theme = {
  ...light,
  palette: {
    ...light.palette,
    screen: {
      main: "#29292c",
      soft: "#565659",
      strong: "#000000",
      contrast: "#ffffff",
    },
    primary: {
      ...light.palette.primary,
      soft: "#003a3d",
      strong: light.palette.primary.soft,
    },
    secondary: {
      ...light.palette.secondary,
      soft: "#811e22",
      strong: light.palette.secondary.soft,
    },
  },
}

export default {
  light,
  dark,
}
✏️ Update src/design/theme/ThemeProvider.tsx to be:
import { useState, createContext, useContext, useMemo } from "react"
import { Appearance } from "react-native"

import themes, { Theme } from "./theme"

type Mode = keyof typeof themes

interface ThemeContext {
  mode: Mode
  setMode: (mode: Mode) => void
}

// Exercise: Update `Context` to set default values for `mode` and `setMode`.
const Context = createContext<ThemeContext>({
  theme,
})

export interface ThemeProviderProps {
  children: React.ReactNode
}

// Exercise: Update `ThemeProvider` to use `useState`, so the user can switch between the 2 modes.
const ThemeProvider: React.FC<ThemeProviderProps> = ({ children }) => {
  const value = useMemo(() => ({ theme }), [])

  return <Context.Provider value={value}>{children}</Context.Provider>
}

export default ThemeProvider

// Exercise: Update `useTheme` to return 1 theme based on the `mode` that is stored in the context.
export function useTheme(): Theme {
  const { theme } = useContext(Context)

  return theme
}

// Exercise: Update `useThemeMode` to return `mode` and `setMode`.
export function useThemeMode(): {
  mode: Mode
  setMode: (mode: Mode) => void
} {
  //
}
✏️ Update src/screens/StateList/StateList.tsx to be:
import Card from "@shared/design/Card"
import Screen from "@shared/design/Screen"
import { useThemeMode } from "@shared/design/theme"
import Typography from "@shared/design/Typography"
import { StyleSheet, Switch, View } from "react-native"

import ListItem from "./components/ListItem"

const states = [
  {
    name: "Illinois",
    short: "IL",
  },
  {
    name: "Wisconsin",
    short: "WI",
  },
]

const StateList: React.FC = () => {
  // Exercise: Display the Switch component to allow users to toggle.

  return (
    <Screen>
      <Card>
        <Typography variant="heading">Place My Order: Coming Soon!</Typography>
      </Card>
      {states?.length ? (
        states.map((state) => <ListItem key={state.short} name={state.name} />)
      ) : (
        <Typography>No states found</Typography>
      )}
      {/* Exercise: Using the recently created `useThemeMode` Hook, combine it with the `Switch` component. */}
    </Screen>
  )
}

const styles = StyleSheet.create({
  row: {
    flexDirection: "row",
    alignItems: "center",
    justifyContent: "space-between",
  },
})

export default StateList
Verify
✏️ Update src/design/theme/ThemeProvider.test.tsx to be:
import {
  render,
  screen,
  renderHook,
  waitFor,
} from "@testing-library/react-native"
import { View, Text } from "react-native"

import ThemeProvider, { useTheme, useThemeMode } from "./ThemeProvider"

describe("Design/Theme", () => {
  describe("ThemeProvider", () => {
    it("renders children", async () => {
      render(
        <ThemeProvider>
          <Text>Hello!</Text>
        </ThemeProvider>,
      )

      expect(screen.getByText(/Hello/)).toBeOnTheScreen()
    })
  })

  describe("ThemeContext", () => {
    const TestComponent: React.FC = () => {
      const theme = useTheme()

      return (
        <View>
          <Text>{theme.palette.primary.main}</Text>
        </View>
      )
    }

    it("exposes context properties", async () => {
      render(<TestComponent />)

      expect(screen.getByText(/#007980/)).toBeOnTheScreen()
    })

    describe("useThemeMode", () => {
      it("toggles the theme", async () => {
        const { result } = renderHook(() => useThemeMode(), {
          wrapper: ThemeProvider,
        })

        expect(result.current.mode).toBe("light")

        result.current.setMode("dark")

        await waitFor(() => {
          expect(result.current.mode).toBe("dark")
        })
      })
    })
  })
})
✏️ Update src/screens/StateList/StateList.test.tsx to be:
import { render, screen, fireEvent } from "@testing-library/react-native"

import StateList from "./StateList"

const mockSetMode = jest.fn()

jest.mock("@shared/design/theme", () => ({
  ...jest.requireActual("@shared/design/theme"),
  useThemeMode: () => ({
    mode: "light",
    setMode: mockSetMode,
  }),
}))

describe("Screens/StateList", () => {
  it("renders", async () => {
    render(<StateList />)
    expect(screen.getByText(/Illinois/i)).toBeOnTheScreen()
    expect(screen.getByText(/Wisconsin/i)).toBeOnTheScreen()
  })

  it("switches to dark mode", () => {
    render(<StateList />)

    const switchElement = screen.getByRole("switch")
    expect(switchElement.props.value).toBe(false)

    fireEvent(switchElement, "onValueChange", true)
    expect(mockSetMode).toHaveBeenCalledWith("dark")
  })
})
Exercise
Refactor src/design/theme/ThemeProvider.tsx:
- Update
Contextto set default values formodeandsetMode. - Update
ThemeProviderto useuseState, so the user can switch between the 2 modes. - Update
useThemeto return 1 theme based on themodethat is stored in the context. - Update
useThemeModeto returnmodeandsetMode.
Refactor src/screens/StateList/StateList.tsx:
- Display the
Switchcomponent to allow users to toggle. - Using the recently created
useThemeModeHook, combine it with theSwitchcomponent.
Solution
If you’ve implemented the solution correctly, the tests will pass when you run npm run test!
Click to see the solution
✏️ Update src/shared/design/theme/ThemeProvider.tsx to be:
import { useState, createContext, useContext, useMemo } from "react"
import { Appearance } from "react-native"

import themes, { Theme } from "./theme"

type Mode = keyof typeof themes

interface ThemeContext {
  mode: Mode
  setMode: (mode: Mode) => void
}

const Context = createContext<ThemeContext>({
  mode: "light",
  setMode: () => undefined,
})

export interface ThemeProviderProps {
  children: React.ReactNode
}

const ThemeProvider: React.FC<ThemeProviderProps> = ({ children }) => {
  const [mode, setMode] = useState<Mode>(Appearance.getColorScheme() || "light")

  const value = useMemo(() => ({ mode, setMode }), [mode])

  return <Context.Provider value={value}>{children}</Context.Provider>
}

export default ThemeProvider

export function useTheme(): Theme {
  const { mode } = useContext(Context)

  return themes[mode]
}

export function useThemeMode(): {
  mode: Mode
  setMode: (mode: Mode) => void
} {
  const { mode, setMode } = useContext(Context)

  return { mode, setMode }
}
✏️ Update src/screens/StateList/StateList.tsx to be:
import Card from "@shared/design/Card"
import Screen from "@shared/design/Screen"
import { useThemeMode } from "@shared/design/theme"
import Typography from "@shared/design/Typography"
import { StyleSheet, Switch, View } from "react-native"

import ListItem from "./components/ListItem"

const states = [
  {
    name: "Illinois",
    short: "IL",
  },
  {
    name: "Wisconsin",
    short: "WI",
  },
]

const StateList: React.FC = () => {
  const { mode, setMode } = useThemeMode()

  return (
    <Screen>
      <Card>
        <Typography variant="heading">Place My Order: Coming Soon!</Typography>
      </Card>
      {states?.length ? (
        states.map((state) => <ListItem key={state.short} name={state.name} />)
      ) : (
        <Typography>No states found</Typography>
      )}

      <Card>
        <View style={styles.row}>
          <Typography variant="heading">Dark mode</Typography>
          <Switch
            onValueChange={(value) => setMode(value ? "dark" : "light")}
            value={mode === "dark"}
          />
        </View>
      </Card>
    </Screen>
  )
}

const styles = StyleSheet.create({
  row: {
    flexDirection: "row",
    alignItems: "center",
    justifyContent: "space-between",
  },
})

export default StateList
Next steps
Next, we will learn how to switch screens with Navigation in React Native.