Navigation in React Native page
Learn how to use navigation to move between screens in a React Native app.
Overview
In this section, you will:
- Understand why navigation is important.
- Understand the navigation lifecycle.
- Implement a bottom tab navigation pattern.
- Learn about the difference between stack and native stack navigation.
- Implement a stack navigation pattern.
Objective 1: Using React Native bottom tab navigation
As our application grows in complexity, more screens will be added. The React Navigation library provides a solution that allows us to move between these screens. In this section, we will cover both common navigation patterns used in both Android and iOS applications: tab navigation and stack navigation.
What is navigation?
Navigation in React Native refers to the process of moving between different screens in our application. It helps users transition between various parts of your application through interactions like tapping on buttons, list rows, and other UI elements.
Why is navigation important?
By introducing several screens in our application, it allows us to break down the user interface into smaller, more manageable parts. This makes our application easier to maintain and scale as it grows.
Deep Linking
Although out of scope for this training, deep linking is a way to navigate to a specific screen or piece of content within your mobile application from an external source. For example, a user might click on a link in an email that opens a specific screen in your app. Deep linking is a powerful tool for user engagement and retention.
The React Navigation library used in this section supports deep linking and has a guide on how to set up your application to be notified of incoming links.
Navigation Lifecycle
Now that we have an understanding of how navigation works within a stack, let’s take a look at the implications of navigation on the component lifecycle.
If we have a stack navigator with two screens, ScreenA and ScreenB, and navigate to ScreenA, then ScreenA will mount the component and render. If we then navigate to ScreenB, ScreenA will remain mounted but will be hidden from view, and ScreenB will mount and render. What happens when we navigate back to ScreenA? ScreenB will be unmounted, but ScreenA will not remount. Because it stayed in the stack, it remained mounted the entire time.
Bottom Tab Navigation
Tab navigation pattern is one of the most common navigation patterns used in both Android and iOS applications. It allows users to switch between different screens by tapping on tabs that are typically located at the bottom of the screen.
Often tabs in a mobile application are made up of more than just one screen. Tab navigation is often used in conjunction with stack navigation to allow for more complex navigation patterns. We will cover how to use React Navigation's stack navigation in the next section.
Here is an example of using tab-based navigation in React Native with React Navigation:
import { createBottomTabNavigator } from "@react-navigation/bottom-tabs"
import { NavigationContainer } from "@react-navigation/native"
import { Text, View } from "react-native"

function HomeScreen() {
  return (
    <View style={{ flex: 1, justifyContent: "center", alignItems: "center" }}>
      <Text>Home screen.</Text>
    </View>
  )
}

function SettingsScreen() {
  return (
    <View style={{ flex: 1, justifyContent: "center", alignItems: "center" }}>
      <Text>Settings screen.</Text>
    </View>
  )
}

const Tab = createBottomTabNavigator()

export default function App() {
  return (
    <NavigationContainer>
      <Tab.Navigator>
        <Tab.Screen name="Home" component={HomeScreen} />
        <Tab.Screen name="Settings" component={SettingsScreen} />
      </Tab.Navigator>
    </NavigationContainer>
  )
}
Let’s break down the code above:
NavigationContainer
The NavigationContainer component is responsible for managing our app state and linking.
This component handles the platform-specific (Android, iOS, etc.) navigation logic and provides functionality to: deep link, notify state changes, and handle back button presses.
createBottomTabNavigator
The createBottomTabNavigator function creates a navigator that renders a tab bar at the bottom of the screen. The components returned from this function are the Tab.Navigator and Tab.Screen components which we use together to define our tab navigation.
The Tab.Navigator component takes Tab.Screen components as children. For each child, a tab button will be added to the tab bar at the bottom of the screen. The Tab.Navigator also has a set of props that can be used to customize the behavior of the tab bar. We can set the initial route with initialRouteName, specify the backBehavior, customize the styles through screenOptions, and more.
The Tab.Screen component takes a name prop that is used to identify the screen and a component prop that is used to render the screen. The name prop must be unique among all the screens in the navigator. Similar to the Tab.Navigator, we can pass an options prop to the Tab.Screen component to customize the title, label, icon, and other props of the tab.
React Native Vector Icons
The React Native Vector Icons repository is an invaluable resource for enhancing your React Native applications with high-quality icons.
This library provides an extensive collection of icons from popular sets such as FontAwesome, Material Icons, and Ionicons.
It integrates seamlessly with React Native, offering versatile components that you can style and scale to meet any design requirements.
By importing your chosen icon set and utilizing the <Icon> component, you can easily specify properties like name, size, and color to incorporate icons into your apps.
Setup 1
✏️ Install the new dependencies:
npm install @react-navigation/native@6 @react-navigation/bottom-tabs@6 react-native-safe-area-context@4 react-native-screens@3 react-native-vector-icons@10
✏️ Install the new dev dependencies:
npm install --save-dev @types/react-native-vector-icons@6 identity-obj-proxy@3
✏️ Terminate the existing dev server and start it again:
npm run start
✏️ Update jest.config.js to be:
module.exports = {
  preset: "react-native",
  clearMocks: true,
  setupFilesAfterEnv: ["<rootDir>/jest-setup.ts"],
  transformIgnorePatterns: [
    "/node_modules/(?!((jest-)?react-native|@react-native(-community)?)|react-navigation|@react-navigation/.*)",
  ],
  moduleNameMapper: {
    "\\.(png)$": "identity-obj-proxy",
  },
}
✏️ Update android/app/build.gradle to be:
apply plugin: "com.android.application"
apply plugin: "org.jetbrains.kotlin.android"
apply plugin: "com.facebook.react"

/**
 * This is the configuration block to customize your React Native Android app.
 * By default you don't need to apply any configuration, just uncomment the lines you need.
 */
react {
    /* Folders */
    //   The root of your project, i.e. where "package.json" lives. Default is '..'
    // root = file("../")
    //   The folder where the react-native NPM package is. Default is ../node_modules/react-native
    // reactNativeDir = file("../node_modules/react-native")
    //   The folder where the react-native Codegen package is. Default is ../node_modules/@react-native/codegen
    // codegenDir = file("../node_modules/@react-native/codegen")
    //   The cli.js file which is the React Native CLI entrypoint. Default is ../node_modules/react-native/cli.js
    // cliFile = file("../node_modules/react-native/cli.js")

    /* Variants */
    //   The list of variants to that are debuggable. For those we're going to
    //   skip the bundling of the JS bundle and the assets. By default is just 'debug'.
    //   If you add flavors like lite, prod, etc. you'll have to list your debuggableVariants.
    // debuggableVariants = ["liteDebug", "prodDebug"]

    /* Bundling */
    //   A list containing the node command and its flags. Default is just 'node'.
    // nodeExecutableAndArgs = ["node"]
    //
    //   The command to run when bundling. By default is 'bundle'
    // bundleCommand = "ram-bundle"
    //
    //   The path to the CLI configuration file. Default is empty.
    // bundleConfig = file(../rn-cli.config.js)
    //
    //   The name of the generated asset file containing your JS bundle
    // bundleAssetName = "MyApplication.android.bundle"
    //
    //   The entry file for bundle generation. Default is 'index.android.js' or 'index.js'
    // entryFile = file("../js/MyApplication.android.js")
    //
    //   A list of extra flags to pass to the 'bundle' commands.
    //   See https://github.com/react-native-community/cli/blob/main/docs/commands.md#bundle
    // extraPackagerArgs = []

    /* Hermes Commands */
    //   The hermes compiler command to run. By default it is 'hermesc'
    // hermesCommand = "$rootDir/my-custom-hermesc/bin/hermesc"
    //
    //   The list of flags to pass to the Hermes compiler. By default is "-O", "-output-source-map"
    // hermesFlags = ["-O", "-output-source-map"]
}

/**
 * Set this to true to Run Proguard on Release builds to minify the Java bytecode.
 */
def enableProguardInReleaseBuilds = false

/**
 * The preferred build flavor of JavaScriptCore (JSC)
 *
 * For example, to use the international variant, you can use:
 * `def jscFlavor = 'org.webkit:android-jsc-intl:+'`
 *
 * The international variant includes ICU i18n library and necessary data
 * allowing to use e.g. `Date.toLocaleString` and `String.localeCompare` that
 * give correct results when using with locales other than en-US. Note that
 * this variant is about 6MiB larger per architecture than default.
 */
def jscFlavor = 'org.webkit:android-jsc:+'

android {
    ndkVersion rootProject.ext.ndkVersion
    buildToolsVersion rootProject.ext.buildToolsVersion
    compileSdk rootProject.ext.compileSdkVersion

    namespace "com.placemyorder"
    defaultConfig {
        applicationId "com.placemyorder"
        minSdkVersion rootProject.ext.minSdkVersion
        targetSdkVersion rootProject.ext.targetSdkVersion
        versionCode 1
        versionName "1.0"
    }
    signingConfigs {
        debug {
            storeFile file('debug.keystore')
            storePassword 'android'
            keyAlias 'androiddebugkey'
            keyPassword 'android'
        }
    }
    buildTypes {
        debug {
            signingConfig signingConfigs.debug
        }
        release {
            // Caution! In production, you need to generate your own keystore file.
            // see https://reactnative.dev/docs/signed-apk-android.
            signingConfig signingConfigs.debug
            minifyEnabled enableProguardInReleaseBuilds
            proguardFiles getDefaultProguardFile("proguard-android.txt"), "proguard-rules.pro"
        }
    }
}

dependencies {
    // The version of react-native is set by the React Native Gradle Plugin
    implementation("com.facebook.react:react-android")

    if (hermesEnabled.toBoolean()) {
        implementation("com.facebook.react:hermes-android")
    } else {
        implementation jscFlavor
    }
}

apply from: file("../../node_modules/@react-native-community/cli-platform-android/native_modules.gradle"); applyNativeModulesAppBuildGradle(project)

apply from: file("../../node_modules/react-native-vector-icons/fonts.gradle")
✏️ Update src/App.tsx to be:
import { createBottomTabNavigator } from "@react-navigation/bottom-tabs"
import { NavigationContainer } from "@react-navigation/native"
import { SafeAreaView } from "react-native-safe-area-context"
import Icon from "react-native-vector-icons/Ionicons"

import ThemeProvider, { useTheme } from "./design/theme/ThemeProvider"
import Settings from "./screens/Settings"
import StateList from "./screens/StateList"

const AppTabs = createBottomTabNavigator()
const AppNavigator: React.FC = () => {
  const theme = useTheme()

  return (
    <AppTabs.Navigator
      initialRouteName="RestaurantsStack"
      screenOptions={({ route }) => ({
        headerStyle: {
          backgroundColor: theme.palette.screen.main,
        },
        headerTitleStyle: {
          color: theme.palette.screen.contrast,
          ...theme.typography.title,
        },
        tabBarStyle: {
          backgroundColor: theme.palette.screen.main,
        },
        tabBarActiveTintColor: theme.palette.primary.strong,
        tabBarInactiveTintColor: theme.palette.screen.contrast,
        tabBarIcon: ({ focused, color }) => {
          // Exercise: Update the Icon component’s name prop based on the route.
          return <Icon name={icon} size={20} color={color} />
        },
      })}
    >
      {/* Exercise: Add the Screens for both the Restaurants and Setting tabs. */}
    </AppTabs.Navigator>
  )
}

const App: React.FC = () => {
  // Exercise: Add the `NavigationContainer` and `AppNavigator` to the `App` component.
  return (
    <SafeAreaView style={{ flex: 1 }}>
      <ThemeProvider>
        <StateList />
      </ThemeProvider>
    </SafeAreaView>
  )
}

export default App
✏️ Create src/screens/Settings/Settings.tsx and update it to be:
import { StyleSheet, Switch, View } from "react-native"
import Card from "../../design/Card"
import Screen from "../../design/Screen"
import { useThemeMode } from "../../design/theme"
import Typography from "../../design/Typography"
const user = {
name: "Your Name",
}
const Settings: React.FC = () => {
const { mode, setMode } = useThemeMode()
return (
<Screen>
<Card>
<Typography variant="heading">Welcome back</Typography>
<Typography variant="body">{user.name || "Unknown name"}</Typography>
</Card>
<Card>
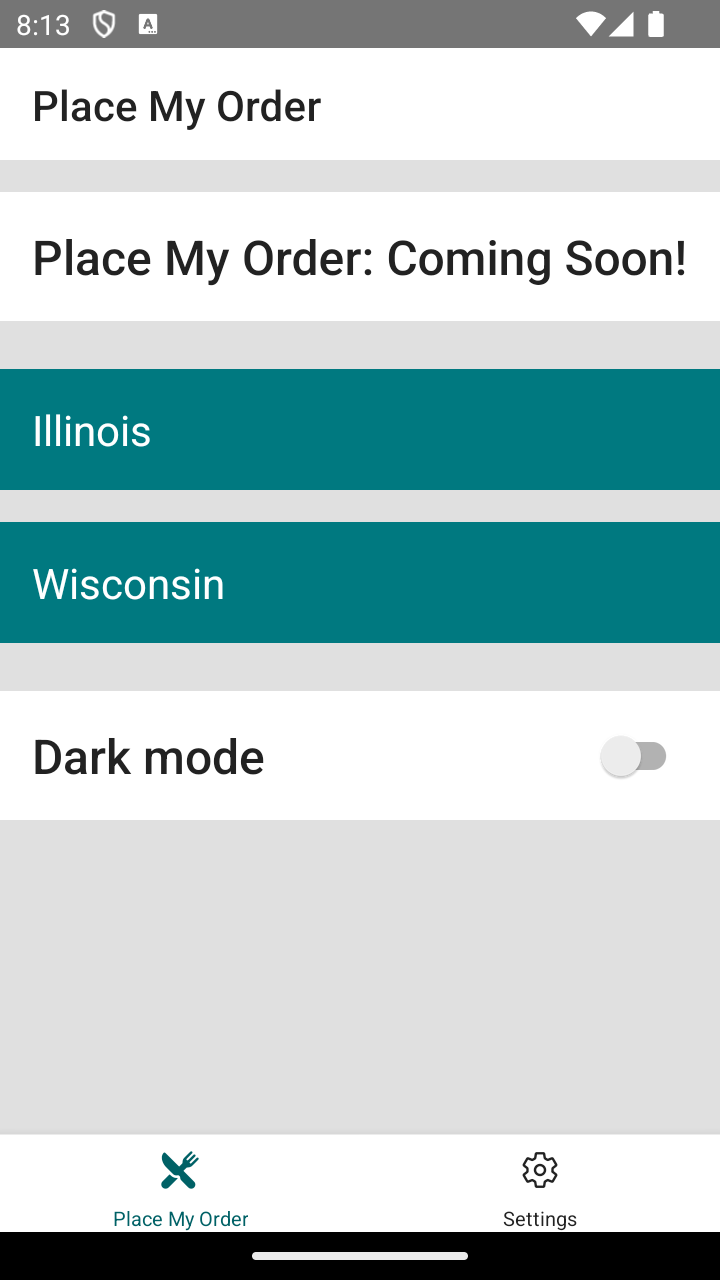
<View style={styles.row}>
<Typography variant="heading">Dark mode</Typography>
<Switch
onValueChange={(value) => setMode(value ? "dark" : "light")}
value={mode === "dark"}
/>
</View>
</Card>
</Screen>
)
}
const styles = StyleSheet.create({
row: {
flexDirection: "row",
alignItems: "center",
justifyContent: "space-between",
},
})
export default Settings
✏️ Create src/screens/Settings/index.ts and update it to be:
export { default } from "./Settings"
export * from "./Settings"
Verify 1
✏️ Update src/App.test.tsx to be:
import { render, screen } from "@testing-library/react-native"

import App from "./App"

describe("App", () => {
  it("renders", async () => {
    render(<App />)

    const placeMyOrderText = screen.getAllByText(/Place my order/i)
    expect(placeMyOrderText).toHaveLength(3)
  })

  it("renders states", async () => {
    render(<App />)

    expect(await screen.findByText(/Illinois/i)).toBeOnTheScreen()
    expect(await screen.findByText(/Wisconsin/i)).toBeOnTheScreen()
  })
})
✏️ Create src/screens/Settings/Settings.test.tsx and update it to be:
import { NavigationContainer } from "@react-navigation/native"
import { fireEvent, render, screen } from "@testing-library/react-native"

import Settings from "./Settings"

const mockSetMode = jest.fn()

jest.mock("../../design/theme", () => ({
  ...jest.requireActual("../../design/theme"),
  useThemeMode: () => ({
    mode: "light",
    setMode: mockSetMode,
  }),
}))

describe("Screens/Settings", () => {
  it("renders", async () => {
    render(
      <NavigationContainer>
        <Settings />
      </NavigationContainer>,
    )
    expect(screen.getByText(/welcome/i)).toBeOnTheScreen()
  })

  it("switches to dark mode", () => {
    render(
      <NavigationContainer>
        <Settings />
      </NavigationContainer>,
    )

    const switchElement = screen.getByRole("switch")
    expect(switchElement.props.value).toBe(false)

    fireEvent(switchElement, "onValueChange", true)
    expect(mockSetMode).toHaveBeenCalledWith("dark")
  })
})
Exercise 1
- For the
tabBarIconprop onAppTabs.Navigatorupdate theIconcomponent’s name prop to be based on the given route. - Add a screen tab for Restaurants (the
StateListcomponent) and forSettingscomponent. - Add the
NavigationContainerandAppNavigatorto theAppcomponent.
Use these API docs for reference:
Solution 1
If you’ve implemented the solution correctly, the tests will pass when you run npm run test!
Click to see the solution
✏️ Update src/App.tsx to be:
import { createBottomTabNavigator } from "@react-navigation/bottom-tabs"
import { NavigationContainer } from "@react-navigation/native"
import { SafeAreaView } from "react-native-safe-area-context"
import Icon from "react-native-vector-icons/Ionicons"

import ThemeProvider, { useTheme } from "./design/theme/ThemeProvider"
import Settings from "./screens/Settings"
import StateList from "./screens/StateList"

const AppTabs = createBottomTabNavigator()
const AppNavigator: React.FC = () => {
  const theme = useTheme()

  return (
    <AppTabs.Navigator
      initialRouteName="RestaurantsStack"
      screenOptions={({ route }) => ({
        headerStyle: {
          backgroundColor: theme.palette.screen.main,
        },
        headerTitleStyle: {
          color: theme.palette.screen.contrast,
          ...theme.typography.title,
        },
        tabBarStyle: {
          backgroundColor: theme.palette.screen.main,
        },
        tabBarActiveTintColor: theme.palette.primary.strong,
        tabBarInactiveTintColor: theme.palette.screen.contrast,
        tabBarIcon: ({ focused, color }) => {
          let icon = "settings"
          if (route.name === "Settings") {
            icon = focused ? "settings" : "settings-outline"
          } else if (route.name === "Restaurants") {
            icon = focused ? "restaurant" : "restaurant-outline"
          }

          return <Icon name={icon} size={20} color={color} />
        },
      })}
    >
      <AppTabs.Screen
        name="Restaurants"
        component={StateList}
        options={{ title: "Place My Order" }}
      />
      <AppTabs.Screen
        name="Settings"
        component={Settings}
        options={{ title: "Settings" }}
      />
    </AppTabs.Navigator>
  )
}

const App: React.FC = () => {
  return (
    <SafeAreaView style={{ flex: 1 }}>
      <ThemeProvider>
        <NavigationContainer>
          <AppNavigator />
        </NavigationContainer>
      </ThemeProvider>
    </SafeAreaView>
  )
}

export default App
Objective 2: Using React Native stack navigation
Now that we’ve covered tab navigation, let’s move on to stack navigation. As mentioned in the previous section, most applications use a combination of both tab and stack navigation to create a seamless user experience.
Stacks
In mobile applications, navigation isn’t managed by the browser through URLs (like in web applications) but through navigation stacks. When a user navigates to a new screen, this screen is pushed onto the navigation stack. If the user navigates back, the current screen is popped off the stack, and the app returns to the previous screen.
Note: A stack is a data structure that follows the Last In, First Out (LIFO) principle.
React Native does not have a built-in global history stack similar to a web browser. Luckily, there is a library called React Navigation that provides a way to manage navigation in a stack-like manner.
Stack vs Native Stack
The React Navigation library provides both a stack navigator as well as a native stack navigator. The native stack navigator uses the native APIs provided by the platform, UINavigationController on iOS and Fragment on Android. Because it is using the native APIs, it provides native performance and exposes native-specific features. Although the stack navigator is not as performant, it does provide several other benefits:
Flexibility and Customization: The JS navigator offers more flexibility in customization. You can tweak animations, transitions, and behaviors directly in JavaScript, which can be advantageous if you need highly customized navigation flows that aren’t easily achieved with native components.
Simpler Setup and Debugging: Since JS navigators are implemented entirely in JavaScript, you don’t have to deal with native code, making setup, maintenance, and debugging generally simpler. This can speed up development, especially if your team specializes in JavaScript and does not have as much experience with native mobile development.
Consistency Across Platforms: JS-based navigators can offer a more consistent look and feel across different platforms (Android and iOS), as the same JavaScript code controls the navigation on both platforms. This can be important for maintaining brand consistency or when you want to ensure the user experience is the same, regardless of the device.
Performance
Both the stack navigator and tab navigator have an optional prop, detachInactiveScreens, that defaults to true. This boolean value indicates whether inactive screens (screens that are not currently visible) should be detached from the view hierarchy. This can improve performance by reducing the number of views that need to be rendered and maintained in memory.
Stack Navigator
Let’s take a look at an example of using a stack navigator in React Native with React Navigation.
import { createStackNavigator } from "@react-navigation/stack"

const Stack = createStackNavigator()

function MyStack() {
  return (
    <Stack.Navigator
      initialRouteName="ScreenA"
      screenOptions={{
        headerMode: "screen",
        headerTintColor: "white",
        headerStyle: { backgroundColor: "tomato" },
      }}
    >
      <Stack.Screen
        name="ScreenA"
        component={ScreenA}
        options={{
          title: "Screen A",
        }}
      />
      <Stack.Screen
        name="ScreenB"
        component={ScreenB}
        options={{
          title: "Screen B",
        }}
      />
      <Stack.Screen
        name="ScreenC"
        component={ScreenC}
        options={{
          gestureEnabled: false,
        }}
      />
    </Stack.Navigator>
  )
}
Let’s break down the code above:
createStackNavigator
Similar to the createBottomTabNavigator function, the createStackNavigator function creates a navigator that renders a stack of screens. The components returned from this function are the Stack.Navigator and Stack.Screen components which we use together to define our stack navigation. Unlike the tab navigator, we do not need to wrap our stack navigator in a NavigationContainer component.
Just like the Tab.Navigator, the Stack.Navigator component takes Stack.Screen components as children.
The initialRouteName specified on the Stack.Navigator component is the name of the screen that should be displayed first when the navigator is rendered and it is also the first entry in the stack. When navigating to a new screen, such as ScreenB, ScreenB will be pushed onto the stack and become the active screen. Now, if we were to press the back button or use a gesture to navigate back, ScreenB would be popped off the stack and ScreenA would become the active screen again.
The Stack.Navigator also accepts a screenOptions prop that we can use to customize the appearance of the header. For example, if we would like to conditionally render a back button in the header, we could check the navigation.canGoBack() method inside of screenOptions.header and render a custom header with or without a back button.
Similar to the Tab.Screen component, we can customize the behavior of our Stack.Screen with an options prop. This prop allows us to customize the header title, card style, whether gestures are enabled, and more.
Setup 2
✏️ Install the new dependencies:
npm install @react-navigation/stack@6 react-native-gesture-handler@2
✏️ Update index.js to be:
/**
 * @format
 */

import "react-native-gesture-handler"
import { AppRegistry } from "react-native"

import { name as appName } from "./app.json"
import App from "./src/App"

AppRegistry.registerComponent(appName, () => App)
✏️ Terminate the existing dev server and start it again:
npm run start
✏️ Update jest-setup.ts to be:
import "@testing-library/react-native/extend-expect"

import "react-native-gesture-handler/jestSetup"

jest.mock("@react-navigation/native", () => {
  const actualNav = jest.requireActual("@react-navigation/native")
  return {
    ...actualNav,
    useNavigation: () => ({
      navigate: jest.fn(),
      setOptions: jest.fn(),
    }),
  }
})

const consoleError = console.error
console.error = (message, ...args) => {
  if (
    typeof message === "string" &&
    message.match(
      /Warning: An update to .+ inside a test was not wrapped in act\(\.\.\.\)\./,
    )
  ) {
    return
  }

  return consoleError(message, ...args)
}
✏️ Update src/App.tsx to be:
import { createBottomTabNavigator } from "@react-navigation/bottom-tabs"
import { NavigationContainer } from "@react-navigation/native"
import { createStackNavigator } from "@react-navigation/stack"
import { Pressable } from "react-native"
import { SafeAreaView } from "react-native-safe-area-context"
import Icon from "react-native-vector-icons/Ionicons"

import Box from "./design/Box"
import ThemeProvider, { useTheme } from "./design/theme/ThemeProvider"
import Typography from "./design/Typography"
import CityList from "./screens/CityList"
import Settings from "./screens/Settings"
import StateList from "./screens/StateList"

const RestaurantsStack = createStackNavigator()
const RestaurantsNavigator: React.FC = () => {
  return (
    <RestaurantsStack.Navigator
      initialRouteName="StateList"
      screenOptions={{
        header: ({ route, navigation }) => {
          // Exercise: Add logic for back navigation.
          return (
            <Pressable onPress={() => console.warn("header pressed")}>
              <Box
                padding="m"
                style={{ flexDirection: "row", gap: 8, alignItems: "center" }}
              >
                <Icon name="arrow-back" size={20} />
                <Typography variant="heading">Choose a location</Typography>
              </Box>
            </Pressable>
          )
        },
      }}
    >
      {/* Exercise: Add Navigator Children for StateList and CityList. */}
    </RestaurantsStack.Navigator>
  )
}

const AppTabs = createBottomTabNavigator()
const AppNavigator: React.FC = () => {
  const theme = useTheme()

  return (
    <AppTabs.Navigator
      initialRouteName="RestaurantsStack"
      screenOptions={({ route }) => ({
        headerStyle: {
          backgroundColor: theme.palette.screen.main,
        },
        headerTitleStyle: {
          color: theme.palette.screen.contrast,
          ...theme.typography.title,
        },
        tabBarStyle: {
          backgroundColor: theme.palette.screen.main,
        },
        tabBarActiveTintColor: theme.palette.primary.strong,
        tabBarInactiveTintColor: theme.palette.screen.contrast,
        tabBarIcon: ({ focused, color }) => {
          let icon = "settings"
          if (route.name === "Settings") {
            icon = focused ? "settings" : "settings-outline"
          } else if (route.name === "Restaurants") {
            icon = focused ? "restaurant" : "restaurant-outline"
          }

          return <Icon name={icon} size={20} color={color} />
        },
      })}
    >
      <AppTabs.Screen
        name="Restaurants"
        component={RestaurantsNavigator}
        options={{ title: "Place My Order" }}
      />
      <AppTabs.Screen
        name="Settings"
        component={Settings}
        options={{ title: "Settings" }}
      />
    </AppTabs.Navigator>
  )
}

const App: React.FC = () => {
  return (
    <SafeAreaView style={{ flex: 1 }}>
      <ThemeProvider>
        <NavigationContainer>
          <AppNavigator />
        </NavigationContainer>
      </ThemeProvider>
    </SafeAreaView>
  )
}

export default App
✏️ Update src/screens/StateList/StateList.tsx to be:
import { useNavigation } from "@react-navigation/native"
import { FlatList } from "react-native"
import Button from "../../design/Button"
import Card from "../../design/Card"
import Screen from "../../design/Screen"
import Typography from "../../design/Typography"
const states = [
{
name: "Illinois",
short: "IL",
},
{
name: "Wisconsin",
short: "WI",
},
]
const StateList: React.FC = () => {
const navigation = useNavigation()
return (
<Screen noScroll>
<Card>
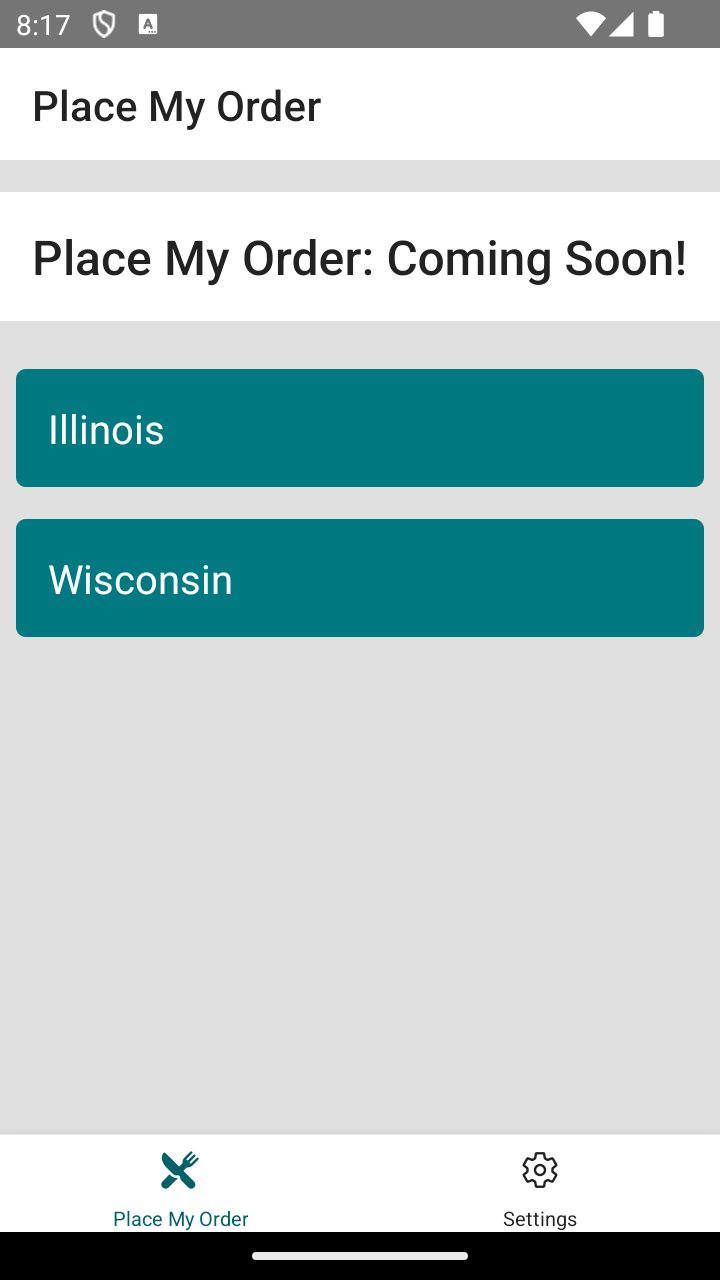
<Typography variant="heading">Place My Order: Coming Soon!</Typography>
</Card>
<FlatList
data={states}
renderItem={({ item: stateItem }) => (
<Button onPress={() => console.warn(`${stateItem.name}`)}>
{stateItem.name}
</Button>
)}
keyExtractor={(item) => item.short}
/>
</Screen>
)
}
export default StateList
✏️ Create src/screens/CityList/CityList.tsx and update it to be:
import { FlatList } from "react-native"

import Button from "../../design/Button"
import Screen from "../../design/Screen"

const cities = [
  { name: "Madison", state: "WI" },
  { name: "Springfield", state: "IL" },
]

const CityList: React.FC = () => {
  return (
    <Screen noScroll>
      <FlatList
        data={cities}
        renderItem={({ item: cityItem }) => (
          <Button onPress={() => console.warn(`${cityItem.name}`)}>
            {cityItem.name}
          </Button>
        )}
        keyExtractor={(item) => item.name}
      />
    </Screen>
  )
}

export default CityList
✏️ Create src/screens/CityList/index.ts and update it to be:
export { default } from "./CityList"
export * from "./CityList"
✏️ Delete src/screens/StateList/components/ and everything in it.
We no longer need the <ListItem> component.
Verify 2
✏️ Update src/screens/StateList/StateList.test.tsx to be:
import { NavigationContainer } from "@react-navigation/native"
import { render, screen } from "@testing-library/react-native"

import StateList from "./StateList"

describe("Screens/StateList", () => {
  it("renders", async () => {
    render(
      <NavigationContainer>
        <StateList />
      </NavigationContainer>,
    )
    expect(screen.getByText(/Illinois/i)).toBeOnTheScreen()
    expect(screen.getByText(/Wisconsin/i)).toBeOnTheScreen()
  })
})
✏️ Create src/screens/CityList/CityList.test.tsx and update it to be:
import { render, screen } from "@testing-library/react-native"

import CityList from "./CityList"

describe("Screens/CityList", () => {
  it("renders", () => {
    render(<CityList />)

    expect(screen.getByText(/Madison/i)).toBeOnTheScreen()
    expect(screen.getByText(/Springfield/i)).toBeOnTheScreen()
  })
})
Exercise 2
- Using
RestaurantsStackimplement aNavigatorwith two screens, one forStateListand one forCityList. - Use
navigationin theStateListcomponent, to linkStateListto theCityListscreen. - Add logic for back navigation.
Solution 2
If you’ve implemented the solution correctly, the tests will pass when you run npm run test!
Click to see the solution
✏️ Update src/App.tsx to be:
import { createBottomTabNavigator } from "@react-navigation/bottom-tabs"
import { NavigationContainer } from "@react-navigation/native"
import { createStackNavigator } from "@react-navigation/stack"
import { Pressable } from "react-native"
import { SafeAreaView } from "react-native-safe-area-context"
import Icon from "react-native-vector-icons/Ionicons"

import Box from "./design/Box"
import ThemeProvider, { useTheme } from "./design/theme/ThemeProvider"
import Typography from "./design/Typography"
import CityList from "./screens/CityList"
import Settings from "./screens/Settings"
import StateList from "./screens/StateList"

const RestaurantsStack = createStackNavigator()
const RestaurantsNavigator: React.FC = () => {
  return (
    <RestaurantsStack.Navigator
      initialRouteName="StateList"
      screenOptions={{
        header: ({ navigation }) => {
          if (!navigation.canGoBack()) return null

          return (
            <Pressable onPress={navigation.goBack}>
              <Box
                padding="m"
                style={{ flexDirection: "row", gap: 8, alignItems: "center" }}
              >
                <Icon name="arrow-back" size={20} />
                <Typography variant="heading">Choose a location</Typography>
              </Box>
            </Pressable>
          )
        },
      }}
    >
      <RestaurantsStack.Screen name="StateList" component={StateList} />
      <RestaurantsStack.Screen name="CityList" component={CityList} />
    </RestaurantsStack.Navigator>
  )
}

const AppTabs = createBottomTabNavigator()
const AppNavigator: React.FC = () => {
  const theme = useTheme()

  return (
    <AppTabs.Navigator
      initialRouteName="RestaurantsStack"
      screenOptions={({ route }) => ({
        headerStyle: {
          backgroundColor: theme.palette.screen.main,
        },
        headerTitleStyle: {
          color: theme.palette.screen.contrast,
          ...theme.typography.title,
        },
        tabBarStyle: {
          backgroundColor: theme.palette.screen.main,
        },
        tabBarActiveTintColor: theme.palette.primary.strong,
        tabBarInactiveTintColor: theme.palette.screen.contrast,
        tabBarIcon: ({ focused, color }) => {
          let icon = "settings"
          if (route.name === "Settings") {
            icon = focused ? "settings" : "settings-outline"
          } else if (route.name === "Restaurants") {
            icon = focused ? "restaurant" : "restaurant-outline"
          }

          return <Icon name={icon} size={20} color={color} />
        },
      })}
    >
      <AppTabs.Screen
        name="Restaurants"
        component={RestaurantsNavigator}
        options={{ title: "Place My Order" }}
      />
      <AppTabs.Screen
        name="Settings"
        component={Settings}
        options={{ title: "Settings" }}
      />
    </AppTabs.Navigator>
  )
}

const App: React.FC = () => {
  return (
    <SafeAreaView style={{ flex: 1 }}>
      <ThemeProvider>
        <NavigationContainer>
          <AppNavigator />
        </NavigationContainer>
      </ThemeProvider>
    </SafeAreaView>
  )
}

export default App
✏️ Update src/screens/StateList/StateList.tsx to be:
import { useNavigation } from "@react-navigation/native"
import { FlatList } from "react-native"

import Button from "../../design/Button"
import Card from "../../design/Card"
import Screen from "../../design/Screen"
import Typography from "../../design/Typography"

const states = [
  {
    name: "Illinois",
    short: "IL",
  },
  {
    name: "Wisconsin",
    short: "WI",
  },
]

const StateList: React.FC = () => {
  const navigation = useNavigation()

  return (
    <Screen noScroll>
      <Card>
        <Typography variant="heading">Place My Order: Coming Soon!</Typography>
      </Card>
      <FlatList
        data={states}
        renderItem={({ item: stateItem }) => (
          <Button
            onPress={() => {
              // @ts-ignore: We will fix this in the next module.
              navigation.navigate("CityList")
            }}
          >
            {stateItem.name}
          </Button>
        )}
        keyExtractor={(item) => item.short}
      />
    </Screen>
  )
}

export default StateList
Objective 3: Add Restaurant List and Restaurant Details pages with links
Setup 3
✏️ Update src/App.tsx to be:
import { createBottomTabNavigator } from "@react-navigation/bottom-tabs"
import { NavigationContainer } from "@react-navigation/native"
import { createStackNavigator } from "@react-navigation/stack"
import { Pressable } from "react-native"
import { SafeAreaView } from "react-native-safe-area-context"
import Icon from "react-native-vector-icons/Ionicons"

import Box from "./design/Box"
import ThemeProvider, { useTheme } from "./design/theme/ThemeProvider"
import Typography from "./design/Typography"
import CityList from "./screens/CityList"
import Settings from "./screens/Settings"
import StateList from "./screens/StateList"

const RestaurantsStack = createStackNavigator()
const RestaurantsNavigator: React.FC = () => {
  return (
    <RestaurantsStack.Navigator
      initialRouteName="StateList"
      screenOptions={{
        header: ({ navigation }) => {
          if (!navigation.canGoBack()) return null

          return (
            <Pressable onPress={navigation.goBack}>
              <Box
                padding="m"
                style={{ flexDirection: "row", gap: 8, alignItems: "center" }}
              >
                <Icon name="arrow-back" size={20} />
                <Typography variant="heading">Choose a location</Typography>
              </Box>
            </Pressable>
          )
        },
      }}
    >
      <RestaurantsStack.Screen name="StateList" component={StateList} />
      <RestaurantsStack.Screen name="CityList" component={CityList} />
      {/* Exercise: Add RestaurantList and RestaurantDetails to the StackNavigator. */}
    </RestaurantsStack.Navigator>
  )
}

const AppTabs = createBottomTabNavigator()
const AppNavigator: React.FC = () => {
  const theme = useTheme()

  return (
    <AppTabs.Navigator
      initialRouteName="RestaurantsStack"
      screenOptions={({ route }) => ({
        headerStyle: {
          backgroundColor: theme.palette.screen.main,
        },
        headerTitleStyle: {
          color: theme.palette.screen.contrast,
          ...theme.typography.title,
        },
        tabBarStyle: {
          backgroundColor: theme.palette.screen.main,
        },
        tabBarActiveTintColor: theme.palette.primary.strong,
        tabBarInactiveTintColor: theme.palette.screen.contrast,
        tabBarIcon: ({ focused, color }) => {
          let icon = "settings"
          if (route.name === "Settings") {
            icon = focused ? "settings" : "settings-outline"
          } else if (route.name === "Restaurants") {
            icon = focused ? "restaurant" : "restaurant-outline"
          }

          return <Icon name={icon} size={20} color={color} />
        },
      })}
    >
      <AppTabs.Screen
        name="Restaurants"
        component={RestaurantsNavigator}
        options={{ title: "Place My Order" }}
      />
      <AppTabs.Screen
        name="Settings"
        component={Settings}
        options={{ title: "Settings" }}
      />
    </AppTabs.Navigator>
  )
}

const App: React.FC = () => {
  return (
    <SafeAreaView style={{ flex: 1 }}>
      <ThemeProvider>
        <NavigationContainer>
          <AppNavigator />
        </NavigationContainer>
      </ThemeProvider>
    </SafeAreaView>
  )
}

export default App
✏️ Create src/components/ (folder)
✏️ Create src/components/RestaurantHeader/ (folder)
✏️ Create src/components/RestaurantHeader/RestaurantHeader.tsx and update it to be:
import { ImageBackground, StyleSheet } from "react-native"

import Box from "../../design/Box"
import { Theme, useTheme } from "../../design/theme"
import Typography from "../../design/Typography"

export interface RestaurantHeaderProps {
  restaurant?: {
    _id: string
    address?: {
      city: string
      state: string
      street: string
      zip: string
    }
    images: {
      banner: string
    }
    name: string
    slug: string
  }
}

const RestaurantHeader: React.FC<RestaurantHeaderProps> = ({ restaurant }) => {
  const theme = useTheme()
  const styles = getStyles(theme)

  return (
    <Box>
      <ImageBackground
        style={styles.heroBackground}
        source={{ uri: restaurant?.images.banner }}
      >
        <Box padding={["xs", "m"]} margin={["s", "none"]} style={styles.hero}>
          <Typography variant="heading" style={styles.heroText}>
            {restaurant?.name}
          </Typography>
        </Box>
      </ImageBackground>

      <Box padding="m">
        {restaurant?.address && (
          <Typography variant="body">
            {restaurant.address.street}
            {restaurant.address.city}, {restaurant.address.state}{" "}
            {restaurant.address.zip}
          </Typography>
        )}

        <Typography variant="body">
          $$$ Hours: M-F 10am-11pm Open Now
        </Typography>
      </Box>
    </Box>
  )
}

function getStyles(theme: Theme) {
  return StyleSheet.create({
    heroBackground: {
      width: "100%",
      maxWidth: 768,
      height: 180,
      margin: "auto",
      justifyContent: "flex-end",
      alignItems: "flex-start",
    },
    hero: {
      backgroundColor: theme.palette.secondary.main + "bb",
    },
    heroText: {
      color: theme.palette.secondary.contrast,
      fontSize: 32,
    },
  })
}

export default RestaurantHeader
✏️ Create src/components/RestaurantHeader/mocks.ts and update it to be:
export const restaurantWithoutAddress = {
  _id: "3ZOZyTY1LH26LnVw",
  images: {
    banner: "banner-image.jpg",
    owner: "owner-image.jpg",
    thumbnail: "thumbnail-image.jpg",
  },
  menu: {
    lunch: [
      {
        name: "Crab Pancakes with Sorrel Syrup",
        price: 35.99,
      },
      {
        name: "Steamed Mussels",
        price: 21.99,
      },
      {
        name: "Spinach Fennel Watercress Ravioli",
        price: 35.99,
      },
    ],
    dinner: [
      {
        name: "Gunthorp Chicken",
        price: 21.99,
      },
      {
        name: "Herring in Lavender Dill Reduction",
        price: 45.99,
      },
      {
        name: "Chicken with Tomato Carrot Chutney Sauce",
        price: 45.99,
      },
    ],
  },
  coordinate: { latitude: 0, longitude: 0 },
  name: "Test Restaurant",
  slug: "poutine-palace",
}

export const restaurantWithAddress = {
  ...restaurantWithoutAddress,
  address: {
    street: "123 Test St",
    city: "Testville",
    state: "TS",
    zip: "12345",
  },
}
✏️ Create src/components/RestaurantHeader/index.ts and update it to be:
export { default } from "./RestaurantHeader"
export * from "./RestaurantHeader"
✏️ Update src/screens/CityList/CityList.tsx to be:
import { useNavigation } from "@react-navigation/native"
import { FlatList } from "react-native"

import Button from "../../design/Button"
import Screen from "../../design/Screen"

const cities = [
  { name: "Madison", state: "WI" },
  { name: "Springfield", state: "IL" },
]

const CityList: React.FC = () => {
  const navigation = useNavigation()
  // Exercise: Use navigation to navigate to RestaurantList.

  return (
    <Screen noScroll>
      <FlatList
        data={cities}
        renderItem={({ item: cityItem }) => (
          <Button onPress={() => console.warn(`${cityItem.name}`)}>
            {cityItem.name}
          </Button>
        )}
        keyExtractor={(item) => item.name}
      />
    </Screen>
  )
}

export default CityList
✏️ Create src/screens/RestaurantDetails/ (folder)
✏️ Create src/screens/RestaurantDetails/RestaurantDetails.tsx and update it to be:
import { useNavigation } from "@react-navigation/native"
import { useEffect } from "react"
import RestaurantHeader from "../../components/RestaurantHeader"
import Button from "../../design/Button"
import Screen from "../../design/Screen"
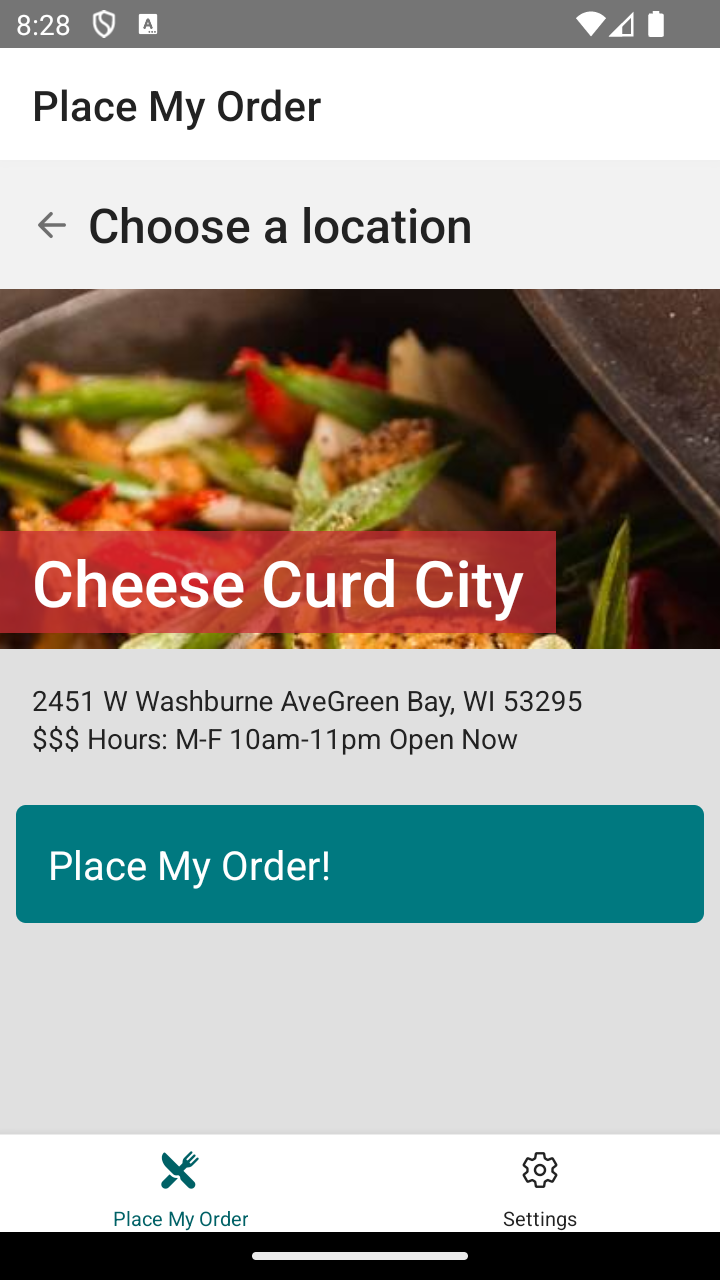
const restaurant = {
_id: "Ar0qBJHxM3ecOhcr",
name: "Cheese Curd City",
slug: "cheese-curd-city",
images: {
thumbnail:
"https://www.place-my-order.com/node_modules/place-my-order-assets/images/2-thumbnail.jpg",
owner:
"https://www.place-my-order.com/node_modules/place-my-order-assets/images/2-owner.jpg",
banner:
"https://www.place-my-order.com/node_modules/place-my-order-assets/images/1-banner.jpg",
},
address: {
street: "2451 W Washburne Ave",
city: "Green Bay",
state: "WI",
zip: "53295",
},
}
const RestaurantDetails: React.FC = () => {
const navigation = useNavigation()
useEffect(() => {
navigation.setOptions({ title: `${restaurant.name}` })
}, [navigation])
return (
<Screen>
<RestaurantHeader restaurant={restaurant} />
<Button onPress={() => console.warn("Place an order")}>
Place an order
</Button>
</Screen>
)
}
export default RestaurantDetails
✏️ Create src/screens/RestaurantDetails/index.ts and update it to be:
export { default } from "./RestaurantDetails"
export * from "./RestaurantDetails"
✏️ Create src/screens/RestaurantList/ (folder)
✏️ Create src/screens/RestaurantList/RestaurantList.tsx and update it to be:
import { useNavigation } from "@react-navigation/native"
import { FlatList } from "react-native"
import Button from "../../design/Button"
import Screen from "../../design/Screen"
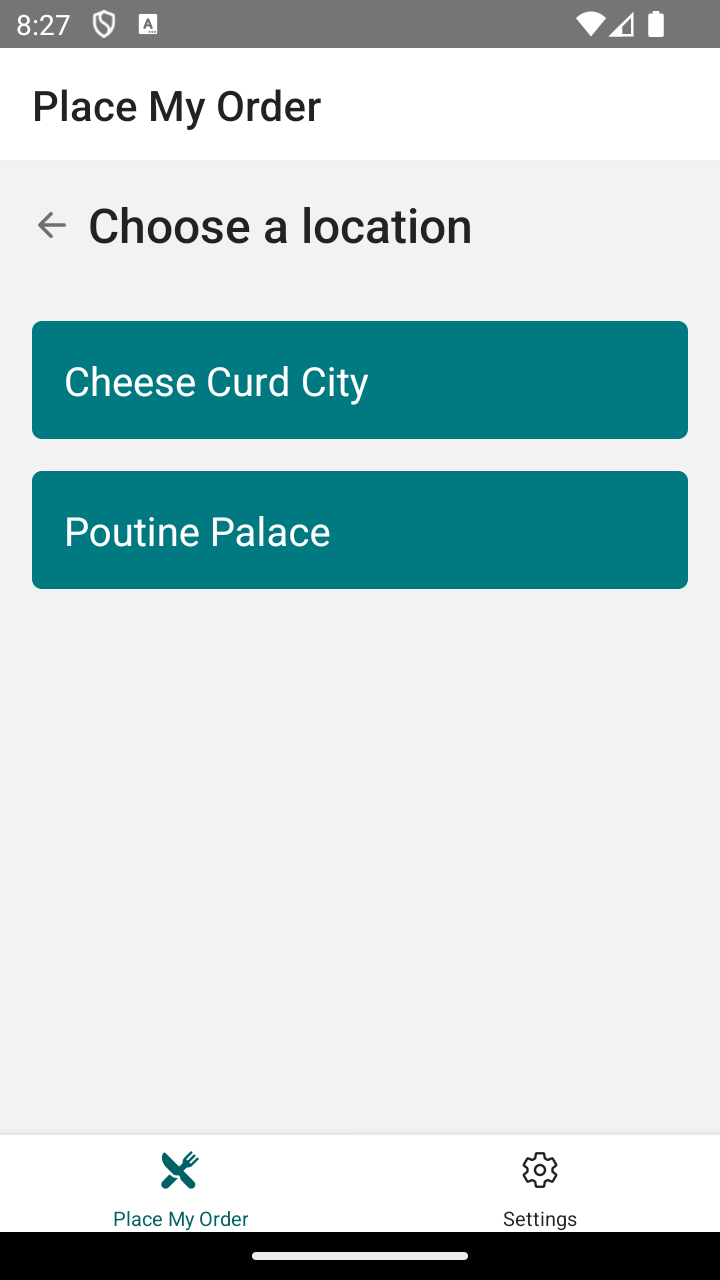
const restaurants = [
{
name: "Cheese Curd City",
slug: "cheese-curd-city",
images: {
thumbnail:
"https://www.place-my-order.com/node_modules/place-my-order-assets/images/2-thumbnail.jpg",
owner:
"https://www.place-my-order.com/node_modules/place-my-order-assets/images/2-owner.jpg",
banner:
"https://www.place-my-order.com/node_modules/place-my-order-assets/images/1-banner.jpg",
},
address: {
street: "2451 W Washburne Ave",
city: "Green Bay",
state: "WI",
zip: "53295",
},
_id: "Ar0qBJHxM3ecOhcr",
},
{
name: "Poutine Palace",
slug: "poutine-palace",
images: {
thumbnail:
"https://www.place-my-order.com/node_modules/place-my-order-assets/images/2-thumbnail.jpg",
owner:
"https://www.place-my-order.com/node_modules/place-my-order-assets/images/2-owner.jpg",
banner:
"https://www.place-my-order.com/node_modules/place-my-order-assets/images/1-banner.jpg",
},
address: {
street: "230 W Kinzie Street",
city: "Green Bay",
state: "WI",
zip: "53205",
},
_id: "3ZOZyTY1LH26LnVw",
},
]
const RestaurantList: React.FC = () => {
const navigation = useNavigation()
// Exercise: Use navigation in the RestaurantList component, to link RestaurantList to the RestaurantDetails screen.
return (
<Screen noScroll>
<FlatList
data={restaurants}
renderItem={({ item: restaurant }) => (
<Button onPress={() => console.log(restaurant.slug)}>
{restaurant.name}
</Button>
)}
keyExtractor={(item) => item._id}
/>
</Screen>
)
}
export default RestaurantList
✏️ Create src/screens/RestaurantList/index.ts and update it to be:
export { default } from "./RestaurantList"
export * from "./RestaurantList"
Verify 3
✏️ Update src/screens/CityList/CityList.test.tsx to be:
import { NavigationContainer } from "@react-navigation/native"
import { render, screen } from "@testing-library/react-native"

import CityList from "./CityList"

describe("Screens/CityList", () => {
  it("renders", () => {
    render(
      <NavigationContainer>
        <CityList />
      </NavigationContainer>,
    )

    expect(screen.getByText(/Madison/i)).toBeOnTheScreen()
    expect(screen.getByText(/Springfield/i)).toBeOnTheScreen()
  })
})
✏️ Create src/components/RestaurantHeader/RestaurantHeader.test.tsx and update it to be:
import { render, screen } from "@testing-library/react-native"

import { restaurantWithAddress, restaurantWithoutAddress } from "./mocks"
import RestaurantHeader from "./RestaurantHeader"

describe("Components/RestaurantHeader", () => {
  it("renders", () => {
    render(<RestaurantHeader restaurant={restaurantWithAddress} />)
    expect(screen.getByText(/\$\$\$/i)).toBeOnTheScreen()
    expect(screen.getByText("$$$", { exact: false })).toBeOnTheScreen()
    expect(
      screen.getByText("Hours: M-F 10am-11pm", { exact: false }),
    ).toBeOnTheScreen()

    expect(screen.getByText(/Test Restaurant/)).toBeOnTheScreen()
    expect(screen.getByText(/\$\$\$/i)).toBeOnTheScreen()
    expect(screen.getByText("$$$", { exact: false })).toBeOnTheScreen()
    expect(
      screen.getByText("Hours: M-F 10am-11pm", { exact: false }),
    ).toBeOnTheScreen()
  })

  it("renders without an address", () => {
    render(<RestaurantHeader restaurant={restaurantWithoutAddress} />)
    expect(
      screen.getByText(/Test Restaurant/i, { exact: false }),
    ).toBeOnTheScreen()
  })

  it("renders the address", () => {
    render(<RestaurantHeader restaurant={restaurantWithAddress} />)

    expect(screen.getByText(/123 Test St/i, { exact: false })).toBeOnTheScreen()
    expect(
      screen.getByText(restaurantWithAddress.address.street, { exact: false }),
    ).toBeOnTheScreen()
    expect(
      screen.getByText(
        `${restaurantWithAddress.address.city}, ${restaurantWithAddress.address.state} ${restaurantWithAddress.address.zip}`,
        { exact: false },
      ),
    ).toBeOnTheScreen()
  })
})
✏️ Create src/screens/RestaurantDetails/RestaurantDetails.test.tsx and update it to be:
import { render, screen } from "@testing-library/react-native"

import RestaurantDetails from "./RestaurantDetails"

jest.mock("@react-navigation/native", () => {
  const actualNav = jest.requireActual("@react-navigation/native")
  return {
    ...actualNav,
    useNavigation: () => ({
      navigate: jest.fn(),
      setOptions: jest.fn(),
    }),
  }
})

describe("Screens/RestaurantDetails", () => {
  it("renders", () => {
    render(<RestaurantDetails />)

    expect(screen.getByText("Cheese Curd City")).toBeOnTheScreen()
  })
})
✏️ Create src/screens/RestaurantList/RestaurantList.test.tsx and update it to be:
import { NavigationContainer } from "@react-navigation/native"
import { render, screen } from "@testing-library/react-native"

import RestaurantList from "./RestaurantList"

describe("Screens/RestaurantList", () => {
  it("renders", () => {
    render(
      <NavigationContainer>
        <RestaurantList />
      </NavigationContainer>,
    )
    expect(screen.getByText(/Cheese Curd City/i)).toBeOnTheScreen()
    expect(screen.getByText(/Poutine Palace/i)).toBeOnTheScreen()
  })
})
Exercise 3
- Add
RestaurantListandRestaurantDetailsto theStackNavigator. - Use
navigationin theCityListcomponent, to linkCityListto theRestaurantListscreen. - Use
navigationin theRestaurantListcomponent, to linkRestaurantListto theRestaurantDetailsscreen.
Solution 3
Note: The tests will pass before you make any changes, so use the application in the emulator to verify your solution!
Click to see the solution
✏️ Update src/App.tsx to be:
import { createBottomTabNavigator } from "@react-navigation/bottom-tabs"
import { NavigationContainer } from "@react-navigation/native"
import { createStackNavigator } from "@react-navigation/stack"
import { Pressable } from "react-native"
import { SafeAreaView } from "react-native-safe-area-context"
import Icon from "react-native-vector-icons/Ionicons"

import Box from "./design/Box"
import ThemeProvider, { useTheme } from "./design/theme/ThemeProvider"
import Typography from "./design/Typography"
import CityList from "./screens/CityList"
import RestaurantDetails from "./screens/RestaurantDetails"
import RestaurantList from "./screens/RestaurantList"
import Settings from "./screens/Settings"
import StateList from "./screens/StateList"

const RestaurantsStack = createStackNavigator()
const RestaurantsNavigator: React.FC = () => {
  return (
    <RestaurantsStack.Navigator
      initialRouteName="StateList"
      screenOptions={{
        header: ({ navigation }) => {
          if (!navigation.canGoBack()) return null

          return (
            <Pressable onPress={navigation.goBack}>
              <Box
                padding="m"
                style={{ flexDirection: "row", gap: 8, alignItems: "center" }}
              >
                <Icon name="arrow-back" size={20} />
                <Typography variant="heading">Choose a location</Typography>
              </Box>
            </Pressable>
          )
        },
      }}
    >
      <RestaurantsStack.Screen name="StateList" component={StateList} />
      <RestaurantsStack.Screen name="CityList" component={CityList} />
      <RestaurantsStack.Screen
        name="RestaurantList"
        component={RestaurantList}
      />
      <RestaurantsStack.Screen
        name="RestaurantDetails"
        component={RestaurantDetails}
      />
    </RestaurantsStack.Navigator>
  )
}

const AppTabs = createBottomTabNavigator()
const AppNavigator: React.FC = () => {
  const theme = useTheme()

  return (
    <AppTabs.Navigator
      initialRouteName="RestaurantsStack"
      screenOptions={({ route }) => ({
        headerStyle: {
          backgroundColor: theme.palette.screen.main,
        },
        headerTitleStyle: {
          color: theme.palette.screen.contrast,
          ...theme.typography.title,
        },
        tabBarStyle: {
          backgroundColor: theme.palette.screen.main,
        },
        tabBarActiveTintColor: theme.palette.primary.strong,
        tabBarInactiveTintColor: theme.palette.screen.contrast,
        tabBarIcon: ({ focused, color }) => {
          let icon = "settings"
          if (route.name === "Settings") {
            icon = focused ? "settings" : "settings-outline"
          } else if (route.name === "Restaurants") {
            icon = focused ? "restaurant" : "restaurant-outline"
          }

          return <Icon name={icon} size={20} color={color} />
        },
      })}
    >
      <AppTabs.Screen
        name="Restaurants"
        component={RestaurantsNavigator}
        options={{ title: "Place My Order" }}
      />
      <AppTabs.Screen
        name="Settings"
        component={Settings}
        options={{ title: "Settings" }}
      />
    </AppTabs.Navigator>
  )
}

const App: React.FC = () => {
  return (
    <SafeAreaView style={{ flex: 1 }}>
      <ThemeProvider>
        <NavigationContainer>
          <AppNavigator />
        </NavigationContainer>
      </ThemeProvider>
    </SafeAreaView>
  )
}

export default App
✏️ Update src/screens/CityList/CityList.tsx to be:
import { useNavigation } from "@react-navigation/native"
import { FlatList } from "react-native"

import Button from "../../design/Button"
import Screen from "../../design/Screen"

const cities = [
  { name: "Madison", state: "WI" },
  { name: "Springfield", state: "IL" },
]

const CityList: React.FC = () => {
  const navigation = useNavigation()

  return (
    <Screen noScroll>
      <FlatList
        data={cities}
        renderItem={({ item: cityItem }) => (
          <Button
            onPress={() => {
              // @ts-ignore: We will fix this in the next module.
              navigation.navigate("RestaurantList")
            }}
          >
            {cityItem.name}
          </Button>
        )}
        keyExtractor={(item) => item.name}
      />
    </Screen>
  )
}

export default CityList
✏️ Update src/screens/RestaurantList/RestaurantList.tsx to be:
import { useNavigation } from "@react-navigation/native"
import { FlatList } from "react-native"

import Button from "../../design/Button"
import Screen from "../../design/Screen"

const restaurants = [
  {
    name: "Cheese Curd City",
    slug: "cheese-curd-city",
    images: {
      thumbnail:
        "https://www.place-my-order.com/node_modules/place-my-order-assets/images/2-thumbnail.jpg",
      owner:
        "https://www.place-my-order.com/node_modules/place-my-order-assets/images/2-owner.jpg",
      banner:
        "https://www.place-my-order.com/node_modules/place-my-order-assets/images/1-banner.jpg",
    },
    address: {
      street: "2451 W Washburne Ave",
      city: "Green Bay",
      state: "WI",
      zip: "53295",
    },
    _id: "Ar0qBJHxM3ecOhcr",
  },
  {
    name: "Poutine Palace",
    slug: "poutine-palace",
    images: {
      thumbnail:
        "https://www.place-my-order.com/node_modules/place-my-order-assets/images/2-thumbnail.jpg",
      owner:
        "https://www.place-my-order.com/node_modules/place-my-order-assets/images/2-owner.jpg",
      banner:
        "https://www.place-my-order.com/node_modules/place-my-order-assets/images/1-banner.jpg",
    },
    address: {
      street: "230 W Kinzie Street",
      city: "Green Bay",
      state: "WI",
      zip: "53205",
    },
    _id: "3ZOZyTY1LH26LnVw",
  },
]

const RestaurantList: React.FC = () => {
  const navigation = useNavigation()

  return (
    <Screen noScroll>
      <FlatList
        data={restaurants}
        renderItem={({ item: restaurant }) => (
          <Button
            onPress={() => {
              // @ts-ignore: We will fix this in the next module.
              navigation.navigate("RestaurantDetails")
            }}
          >
            {restaurant.name}
          </Button>
        )}
        keyExtractor={(item) => item._id}
      />
    </Screen>
  )
}

export default RestaurantList
Next steps
Now that we understand how to use React Native Navigation, we’ll supplement that knowledge by storing state in Navigation Parameters.