Styling in React Native page
Learn how to use the style prop and the StyleSheet API in React Native.
Overview
In this section, you will:
- Use the
styleprop. - Use the
StyleSheetAPI in React Native. - Combine stylesheets together.
- Use CSS shorthands in React Native.
Objective: Styling an individual element
Styling is a crucial part of building visually appealing and responsive applications.
Understanding how to effectively use the style prop and the StyleSheet APIs is fundamental for creating React Native applications.

The style prop
In React Native, almost every component can receive a style prop.
This prop can accept a JavaScript object that defines various CSS-like properties to control the appearance of the component.
There are a couple main ways how the style prop is generally used:
Inline styling
You can directly pass an object to the style prop.
This is convenient for dynamic styles that depend on the component’s state or props, but it can be less performant for static styles.
const InlineStyleExample = () => (
  <Text style={{ color: "red", fontSize: 20 }}>Hello, React Native!</Text>
)
In the code above, we pass an object to the style prop that uses keys similar to CSS properties.
The StyleSheet API
More commonly, and recommended for performance reasons (unless the styles are dynamic), styles are defined using StyleSheet.create().
This method abstracts the style objects and validates them at the application start-up, reducing the overhead of creating styles on the fly.
const styles = StyleSheet.create({
  text: {
    color: "blue",
    fontSize: 20,
  },
})

const StyleSheetStyleExample = () => (
  <Text style={styles.text}>Hello, StyleSheet!</Text>
)
In the code above, we call StyleSheet.create() with an object.
If you’re familiar with front-end web development, the object keys are similar to classes in CSS.
We can then reference those styles as objects we pass into the style prop.
Why is the StyleSheet API better?
StyleSheet is a React Native API that provides an abstraction similar to CSS stylesheets.
Using StyleSheet has several advantages:
- Performance: Styles that are defined in
StyleSheetare sent to the native platform once and referenced by ID instead of passing full style objects. - Validation:
StyleSheethelps catch errors early by validating the styles and showing clear errors in development. - Reusability: Styles can be defined once and reused across components, reducing code duplication and improving maintainability.
We will look more into reusing styles in the next module.
Composing stylesheets
StyleSheet.compose is a method provided by React Native that lets you merge two styles into a single style object.
This is useful when you want to combine base styles with additional styles based on certain conditions.
Let’s look at an example:
import { SafeAreaView, StyleSheet, Text } from "react-native"

const styles = StyleSheet.create({
  base: {
    color: "black",
    fontSize: 16,
  },
  bold: {
    fontWeight: "bold",
  },
  redText: {
    color: "red",
  },
})

const combinedStyle = StyleSheet.compose(styles.base, styles.bold)

const App: React.FC = () => {
  return (
    <SafeAreaView style={combinedStyle}>
      <Text>This is bold text with base styles.</Text>
    </SafeAreaView>
  )
}

export default App
In the example above, the resulting combinedStyle will have the fontSize and color from base and the fontWeight from bold.
CSS shorthands
CSS shorthands in React Native allow developers to combine multiple related style properties into a single property. This not only reduces the amount of code but also helps in managing multiple style attributes efficiently. React Native has adapted some of these shorthand properties to suit the styling paradigms of mobile app development, which includes handling layout, padding, margin, and border styling more effectively.
For example, styling margin-bottom and margin-top together can be shortened to:
const styles = StyleSheet.create({
  container: {
    marginVertical: 20,
  },
})
This is equivalent to:
const styles = StyleSheet.create({
  container: {
    marginTop: 20,
    marginBottom: 20,
  },
})
Find more information about these shorthands in the Layout Props documentation.
Setup
✏️ Update src/screens/StateList/StateList.tsx to remove the debugger we had in the last exercise:
import { ScrollView, Text, View } from "react-native"

import ListItem from "./components/ListItem"

const states = [
  {
    name: "Illinois",
    short: "IL",
  },
  {
    name: "Wisconsin",
    short: "WI",
  },
]

const StateList: React.FC = () => {
  return (
    <ScrollView>
      <View>
        <Text>Place My Order: Coming Soon!</Text>
      </View>
      <View>
        {states?.length ? (
          states.map((state) => (
            <ListItem key={state.short} name={state.name} />
          ))
        ) : (
          <Text>No states found</Text>
        )}
      </View>
    </ScrollView>
  )
}

export default StateList
✏️ Update src/screens/StateList/components/ListItem/ListItem.tsx to be:
import { StyleSheet, Text } from "react-native"

export interface ListItemProps {
  name: string
}

const ListItem: React.FC<ListItemProps> = ({ name }) => {
  // Exercise: Apply the given CSS styles to the `Text` view inside the `ListItem`.
  return <Text>{name}</Text>
}

export default ListItem
Verify
✏️ Update src/screens/StateList/components/ListItem/ListItem.test.tsx to be:
import { render, screen } from "@testing-library/react-native"

import ListItem from "./ListItem"

describe("Screens/StateList/ListItem", () => {
  it("renders", async () => {
    render(<ListItem name="test prop" />)
    expect(screen.getByText(/test prop/i, { exact: false })).toBeOnTheScreen()
  })

  it("has the correct styles", async () => {
    render(<ListItem name="One" />)

    const element = screen.getByText(/One/i)
    expect(element).toBeOnTheScreen()

    expect(element).toHaveStyle({
      fontSize: 21,
      color: "#ffffff",
      backgroundColor: "#007980",
      padding: 16,
      marginVertical: 8,
    })
  })
})
Exercise
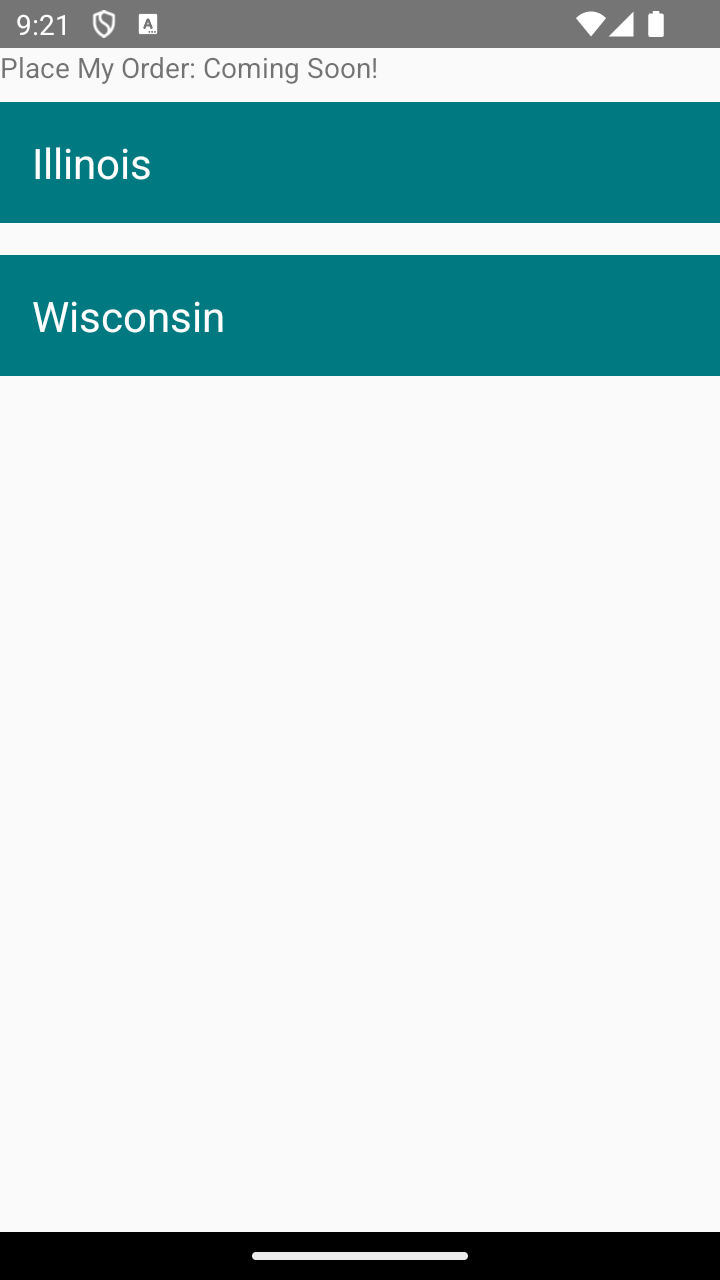
Apply the following CSS styles to the Text view inside the ListItem:
.text {
  font-size: 21px;
  color: "#ffffff";
  background-color: "#007980";
  padding: 16px;
  margin-bottom: 8px;
  margin-top: 8px;
}
Solution
If you’ve implemented the solution correctly, the tests will pass when you run npm run test!
Click to see the solution
✏️ Update src/screens/StateList/components/ListItem/ListItem.tsx to be:
import { StyleSheet, Text } from "react-native"

export interface ListItemProps {
  name: string
}

const ListItem: React.FC<ListItemProps> = ({ name }) => {
  return <Text style={styles.text}>{name}</Text>
}

const styles = StyleSheet.create({
  text: {
    fontSize: 21,
    color: "#ffffff",
    backgroundColor: "#007980",
    padding: 16,
    marginVertical: 8,
  },
})

export default ListItem
Next steps
Next, let’s learn about how React Context can help us build a theme system.

